Writing and Editing Articles
This article covers the article editor: creating an article, working with blocks, saving and publishing, working copies, and revisions. For the options in the Advanced panel, see Article Settings.
Create an article
- In the left navigation, click Content.
- Click Create Article.
- Enter a Name and choose a Post Type.
- Click Add article. The editor opens with your new article.
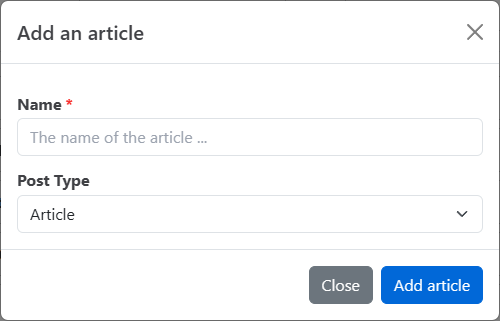
New articles start as Draft, so readers can't see them until you publish. If you open Create Article while a category is selected in the content list, the article is added to that category.
| Post Type | Use it for |
|---|---|
| Article | Help and knowledge base content. Articles are organized in categories. |
| API Reference | Documenting a REST endpoint. The editor adds an HTTP verb and a path field above the content. See Editor Blocks Reference. |
| Blog Post | Dated posts. Blog posts have an editable permalink. |
You can also start a new article from inside the editor: open the menu next to the save button and click New Article. Blog projects use Create Post instead of Create Article. The default post type is set under Settings > General > Default Post Type.
Work with blocks
Article content is made of blocks: paragraphs, headings, lists, images, callouts and so on. Each block is edited on its own and can be moved or converted.
Add a block
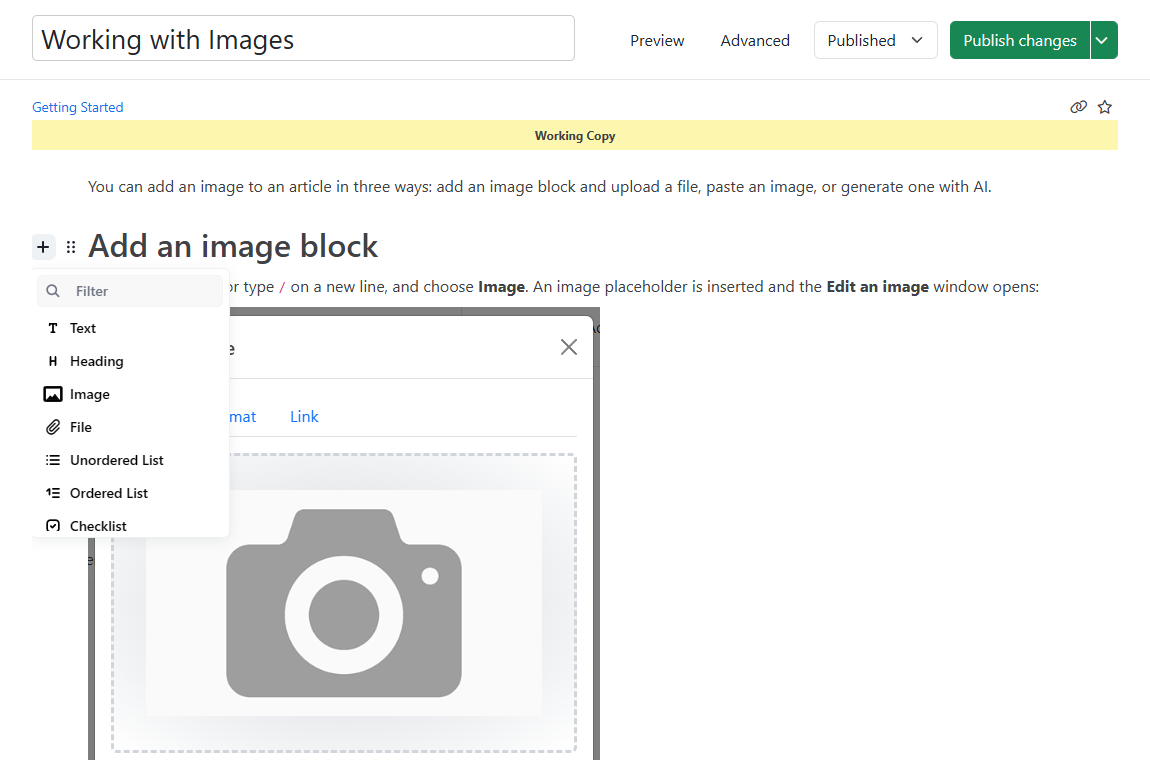
Click the + button to the left of an empty line, or type / at the start of an empty line. Pick a block type from the menu. For every block type, see Editor Blocks Reference.
Move, convert or delete a block
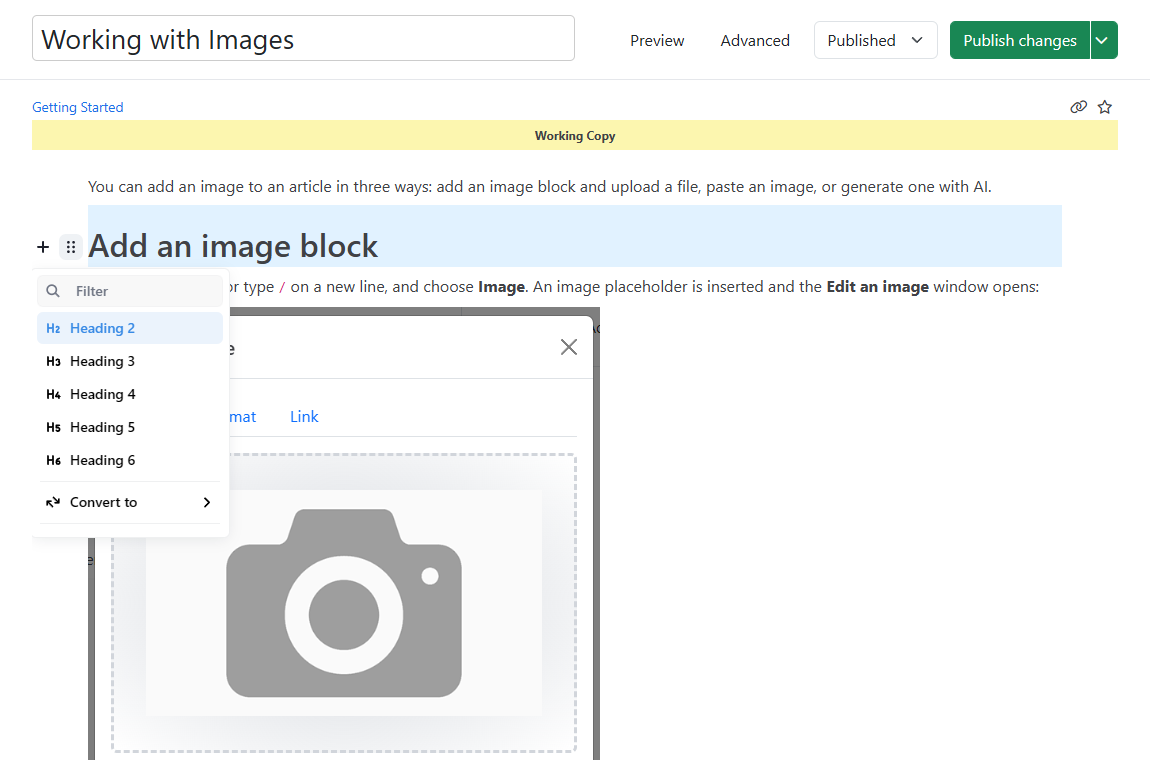
Hover over a block and click the tune button (the dotted handle next to +). The tune menu lets you move the block up or down, delete it, or convert it to another type. Some blocks add their own options here, such as Edit Image, Edit File, a callout's style, or an FAQ's heading level.
Format text
Select text to show the inline toolbar. Use it to make text bold or italic, format it as inline code, or add a link. Keyboard shortcuts such as Ctrl+B (Cmd+B on Mac) work too. For links, see Working with Links.
Undo and redo
Press Ctrl+Z (Cmd+Z on Mac) to undo and Ctrl+Shift+Z (Cmd+Shift+Z) to redo.
Paste images
Paste an image from your clipboard into the editor. It's uploaded to your CDN and added as an image block. See Working with Images.
Unsaved changesIf you try to leave the editor with unsaved changes, your browser asks you to confirm first.
Title and permalink
Type the article's title in the field at the top of the editor. The URL is created from the title when the article is created.
For articles and API references, the editor shows the article's category path (breadcrumbs) under the title. For blog posts, it shows the permalink. To change a blog post's permalink:
- Click Edit next to the permalink.
- Change the text. HelpGuides lowercases it and removes anything other than letters, numbers and hyphens.
- Click Save, or Cancel to keep the current permalink.
The new permalink is saved immediately. Check that links and bookmarks to the old URL still reach the post, and add a redirect on the Redirects page if they don't.
Statuses
Choose the status from the list next to the save button. The new status applies when you publish your changes (see below).
| Status | What it means |
|---|---|
| Published | Live on your docs site. |
| Draft | Not visible to readers. Signed-in team members can view it with Preview. |
| Unlisted | Anyone with the link can view it. |
| Scheduled | Publishes automatically at the date and time you set. See Scheduling Articles and the Content Calendar. |
| Deleted | Removed from your site. The editor shows the date it will be permanently deleted, 30 days later. |
To find articles by status, use the Filter list on the Content page.
Save and publish
The save button changes as you work:
| Button | What it does |
|---|---|
| Save changes | Saves your edits as a working copy. Readers still see the previous version. |
| Publish changes | Appears after you save. Makes the working copy the live version and applies the selected status. If the status is Draft, the article stays a draft. |
| Save & Publish | In the menu next to the save button. Saves and publishes in one step and sets the status to Published. |
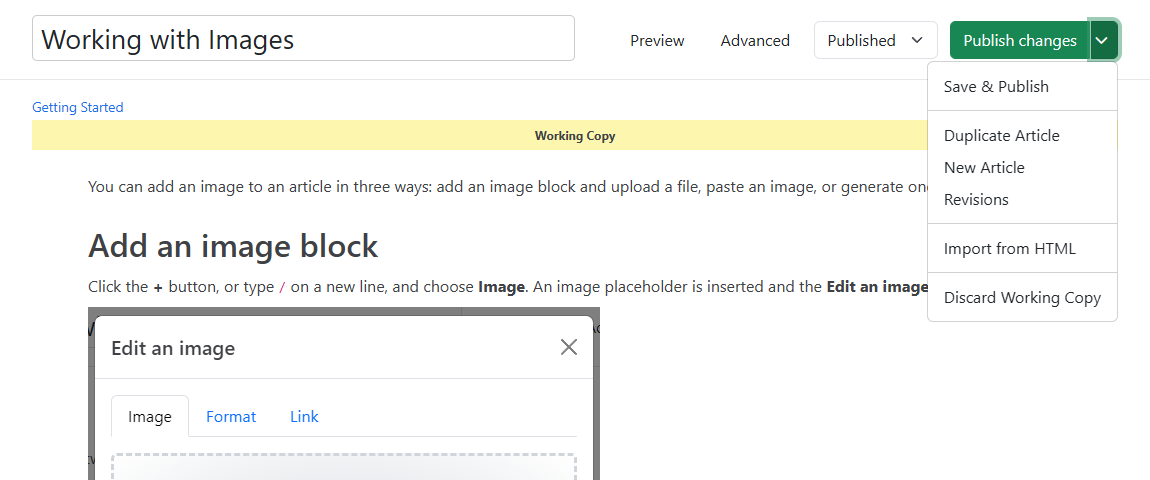
Content and status changes only reach your site when you click Publish changes or Save & Publish. Settings in the Advanced panel are different: they're saved with that panel's Save Options button.
Working copies
A working copy holds saved edits that aren't live yet. You can save as often as you like and publish when all your edits are done.
- The editor shows a Working Copy label while one exists.
- On the Content page, the article shows a Has Working Copy label. In blog projects, you can also choose Has Working Copy in the Filter list.
- To throw away a working copy, open the menu next to the save button and click Discard Working Copy. The editor reloads the live version.
Revisions
HelpGuides keeps a history of your article. Each revision is the content that was live just before a save.
- Open the menu next to the save button and click Revisions.
- Select a revision in the list to preview it.
- Click Restore as Working Copy. The live article doesn't change.
- Review the restored content, then publish it.
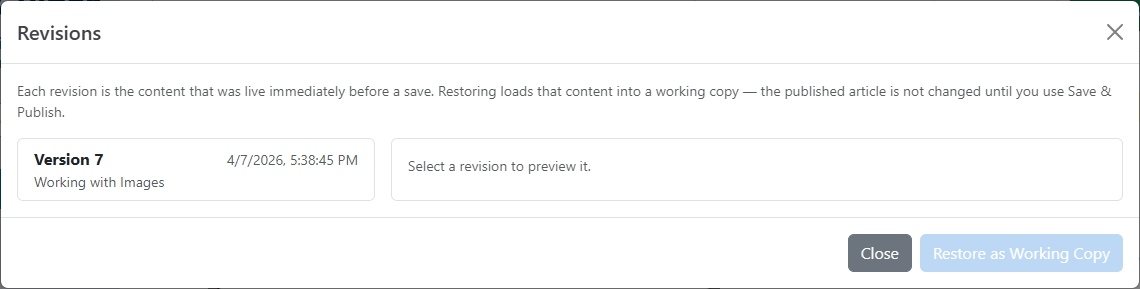
If an unpublished working copy was left behind, the Revisions window shows Unpublished working copy found. Click Preview to look at it, or Recover as Working Copy to load it back into the editor.
More actions
These are in the menu next to the save button:
| Action | What it does |
|---|---|
| Duplicate Article | Creates a draft copy with [DUPLICATE] added to the title, and opens it. |
| New Article | Opens the Add an article window. |
| Import from HTML | Converts pasted HTML into blocks. Images in the HTML are copied to your project. |
Import HTML replaces the article's content and saves it straight away, without a working copy. If the article is published, the imported content goes live.
Preview, copy the URL and favorite
- Preview opens the article on your docs site while you're signed in, so you can also view drafts and scheduled articles. It shows the published version, not your working copy. The page includes the admin toolbar.
- Click the link icon under the title to copy the article's URL.
- Click the star to favorite the article. Favorited published articles are listed in your site's llms.txt file. See Using LLMS.txt.