Welcome to HelpGuides.io!
HelpGuides is a modern knowledge management platform built for the future of the AI-powered Internet.
Getting Started
Getting started with HelpGuides is simple.
It includes an intuitive editing experience and organizes content into blocks. You can move, edit, and event tune blocks to change them.
And, HelpGuides still allows HTML. But you don't need to know anything about HTML to create great content. More importantly HelpGuides optimizes your content, along with other advanced tools, to make it easy for search engines, and more importantly, LLMs to consume your content.
Step 1 - Create a New Project
When you create a new HelpGuides account, the first thing you'll see is a screen that looks like:
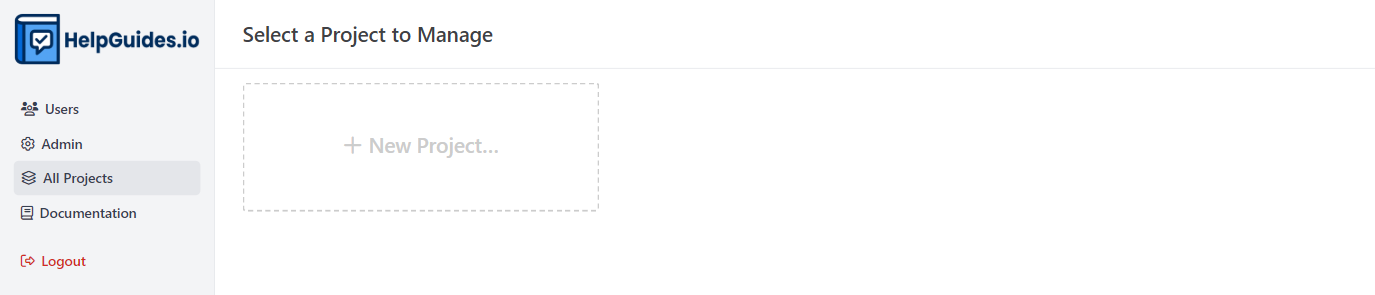
HelpGuides allow you to manage many projects, where each project is a knowledge base.
Click + New Project and select a name for your project.
Step 2 - Check out the Welcome Article
When you create a new project, a Welcome to HelpGuides! article is automatically created.
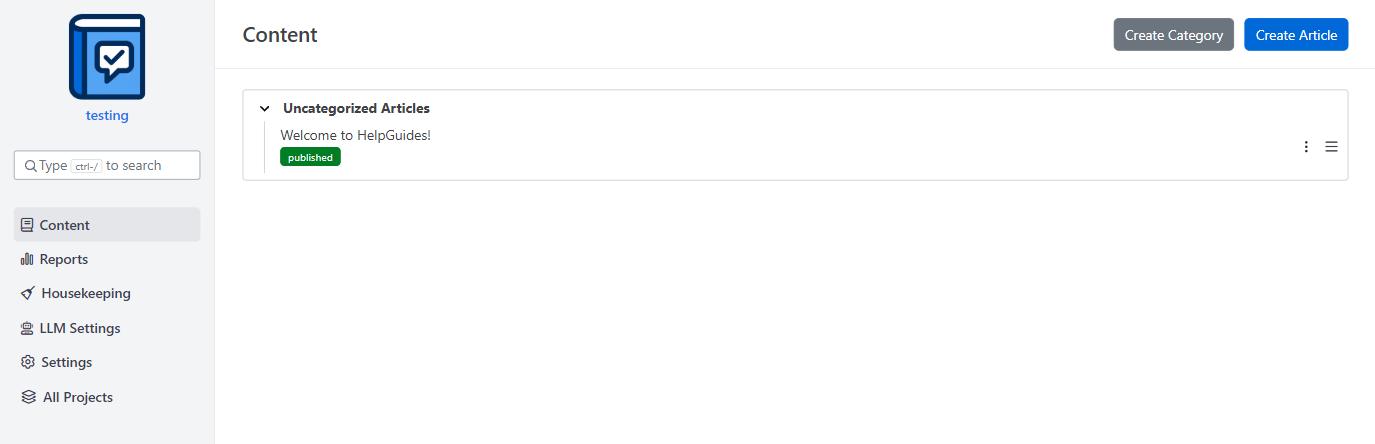
The Welcome to HelpGuides! article has some useful links and information in it, including links to these article and others. Feel free to edit or delete it. It's a simple way to familiarize yourself with the editing and publishing experience.
Step 3 - Finish Setting Up your Project
Using the navigation on the left, click on Settings.
Now that your project is setup, let's publish your first article.
Creating your First Article
HelpGuides supports content in different stages of your publishing lifecycle: published, draft, and private.
It additionally supports working copies of your published content. This simply means that once content is published you can make changes to a working copy and publish those changes live when all your edits are complete. Or, if you are unhappy with the working copy simply discard it.
Finally, for saved changes HelpGuides manages full revision history. So, if you lose something important, you can just go back to an older revision.
Writing Content
Whether creating a new article or editing an existing article, you'll find the editing experience simple and intuitive.
Let's explore some of the basics:
Block Toolbar
When you start typing, or whenever you hover over an existing block, you'll see a several icons on the left:

- The plus button is used to add a new "block"
- The other button is an options button that gives you options to explore for the current block, such as moving the block or converting to another type of block.
You can also create a new block by typing / on the first line when editing.
Blocks are simple, and the best way to learn them is to simply try and edit or write content.
Text
Working with text is easy - just start typing. You can select text that you want to bold, italicize or even add links to.
Normal keyboard shortcuts, such as control-B to bold text, work as expected. But you can also go back later and highlight sections of text to add links, bold, italicize and even insert custom HTML.
Images
Images are a key feature. We've made it as easy as possible to add and edit images. You can copy/paste an image and it is automatically uploaded and published in a Content Delivery Network (CDN). Or, you can add a new image block and select the image yourself.
Links
Another important feature when creating content is adding links.
- Highlight the text to add the link to.
- You'll see a menu popup with a link icon
- Click the link icon
Publishing Your First Article
When you are ready to publish your first article:
- Change the status from Draft to Published.
- Click 'Save Changes' to save the latest changes.
- Click 'Publish Changes' to publish the current version.
- Click 'Preview' to view the published article.
Content is only published when you explicitly Publish Changes. Saving changes in a published article is known as a Working Copy. This enables working on an update of an article, saving changes and not publishing those changes until all edits are complete.