Managing Projects
A project is one knowledge base: its own articles, categories, settings and web address. Your account can have several projects, for example product documentation, a developer portal and a blog. Everyone on your team can work on every project.
All Projects
Click All Projects in the left navigation to see every project in your account. Each project shows its logo, name, web address and status: Active or Deleted. Click a project to open it.
To switch to another project while you're working in one, click All Projects at the bottom of the left navigation, then choose the project.
Creating a project
- On the All Projects page, click New Project….
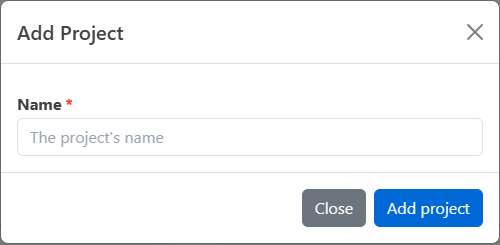
- In the Add Project dialog, enter a Name.
- Click Add project. The new project opens.
The number of projects you can create depends on your plan. If you've reached your plan's limit, HelpGuides shows a message instead of creating the project.
What a new project starts with
- A helpguides.io address. HelpGuides makes a subdomain from the project's name, for example Acme Product becomes
acme-product.helpguides.io. If that's taken, a number is added. If the name contains a reserved word, such as docs, help or support, the project gets a random subdomain instead. To change it, contact support. - Search engine indexing turned off, so nothing is indexed while you set up. Turn on Allow Search Engine Indexing in Settings when you're ready.
- A welcome article in a Welcome to HelpGuides! category. Edit or delete it as you like.
Next, add your branding and choose your defaults in Project Settings. If you already have content elsewhere, see Importing and Exporting Content. For a guided tour, see Welcome to HelpGuides.io.
Deleting a project
- Open the project and click Settings.
- Open the Advanced tab and click Delete Project.
- In the Confirm Delete dialog, type the project's name exactly as it appears in Title. The name is case-sensitive.
- Click Delete.
You're taken back to All Projects, where the project is marked Deleted. The project is now scheduled to be permanently deleted.
Export firstBefore you delete a project you might need again, back up its posts. On the Import / Export tab in Settings, click Export Posts.
Reactivating a deleted project
If you deleted a project by mistake, you can bring it back until it's permanently deleted. Anyone on your team can do this.
- On the All Projects page, click the project marked Deleted.
- You'll see This Project is Scheduled to be Deleted. Click Reactivate Project.
The project opens and is Active again, with its content and settings as they were.
Related
- Managing Your Team: adding and removing the people who can work on your projects.
- Setup Reverse Proxy: serving a project from a path on your own website.
- API Keys and the REST API: working with a project's content from your own code.