Setup Reverse Proxy
HelpGuides supports serving your content through a reverse proxy, for advanced setups where your documentation or blog needs to live under a path on your main website.
What is Reverse Proxy?
For the sake of example, let's say you own a domain example.com. You have an existing website using that domain running WordPress where you host a blog: example.com/blog/example-name.
You then create a HelpGuides project at myproject.helpguides.io, and want to move your blog from WordPress to HelpGuides while keeping WordPress for your main website. A reverse proxy makes this possible.
How it works
Requests sent to example.com/blog/example-name are proxied to myproject.helpguides.io/example-name. The content is hosted at myproject.helpguides.io, but the browser URL and canonical URL remain example.com/blog/example-name.
Why use a reverse proxy?
A reverse proxy lets you:
- Move content to HelpGuides (search, APIs, AI tools and more) without moving your whole website.
- Keep existing, published URLs working.
- Keep content on your root domain instead of a subdomain, which is better for SEO.
Setting up a Reverse Proxy
Setting up a reverse proxy is an advanced task, but platforms such as Cloudflare make it relatively simple.
RecommendedIf you want to support a reverse proxy for your HelpGuides content, please contact support. Reverse proxy configuration is only available in our enterprise plans.
Reverse proxy with Cloudflare
ImportantSetting up a reverse proxy with Cloudflare requires your domain's DNS to be managed by Cloudflare. If you can't move your DNS to Cloudflare, you can't use Cloudflare as your reverse proxy.
Step 1 - Get your application domain
Your Application Domain is in Settings → General:
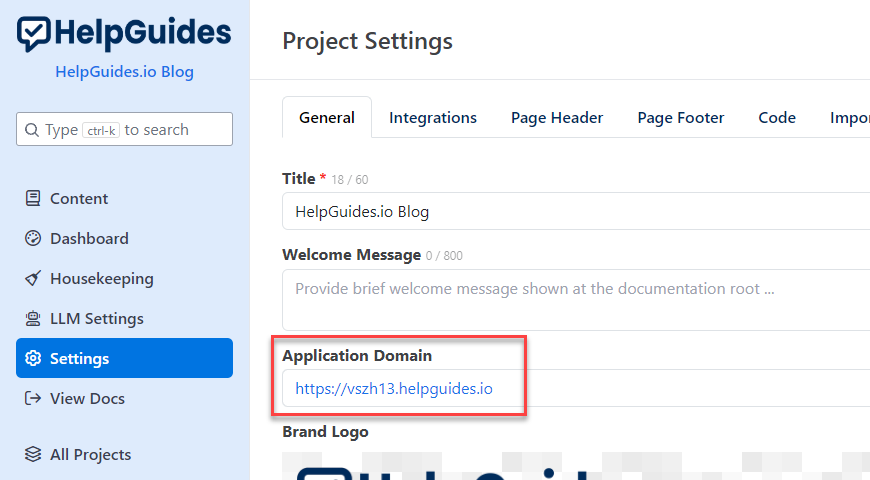
Without a reverse proxy, this is the address where your content is served. HelpGuides also supports custom subdomains.
Step 2 - Get your canonical path
Your canonical path is configured by the HelpGuides team. Once it's set up, you'll see it in Settings → Advanced → Canonical Path:
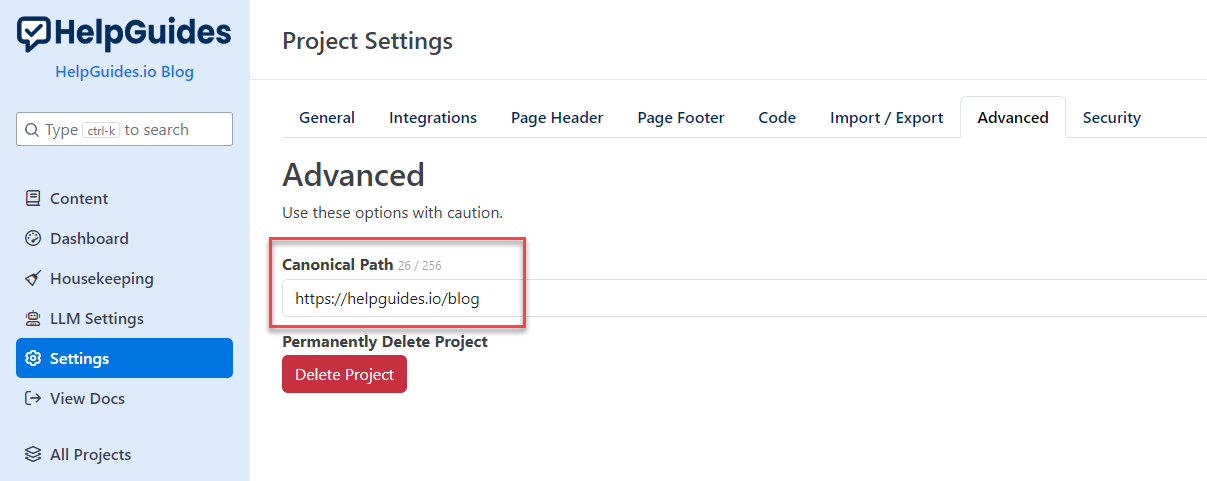
In this example, requests to https://helpguides.io/blog are mapped to the application domain https://vszh13.helpguides.io. Your setup would map, for example, https://yourdomain.com/blog to https://[your subdomain].helpguides.io. Once a canonical path is set, HelpGuides uses it for canonical URLs, sitemaps and feeds, and redirects visitors who go straight to the application domain.
Step 3 - Create a Cloudflare worker
Create a Cloudflare worker that forwards requests from your domain to your HelpGuides project. You'll need your Application Domain. The script below forwards any request whose path starts with /blog.
For example, a request to:
is reverse proxied to:
Replace the app_domain value with your own Application Domain, with no trailing slash. If you use a path other than /blog, change it throughout the script.
Step 4 - Add a route for the worker
In Cloudflare, add a route for the worker that matches your path, for example example.com/blog*, so requests under /blog go to the worker and the rest of your site is unaffected. Then open a few URLs under /blog to check that articles, images and search work.
Related: Site Map, Feeds and Machine-Readable Formats, Finding Broken Links with the SEO Report (covers Force Trailing Slash).